The Holiday Home

A cozy couch and table set with holiday decor.

If you are planning on hosting any family gatherings this holiday season, you know that time is of the essence! In this blog, Ellecor Interior Design explains how you can use your existing decor in order to make your home holiday-ready!

Use What You Have

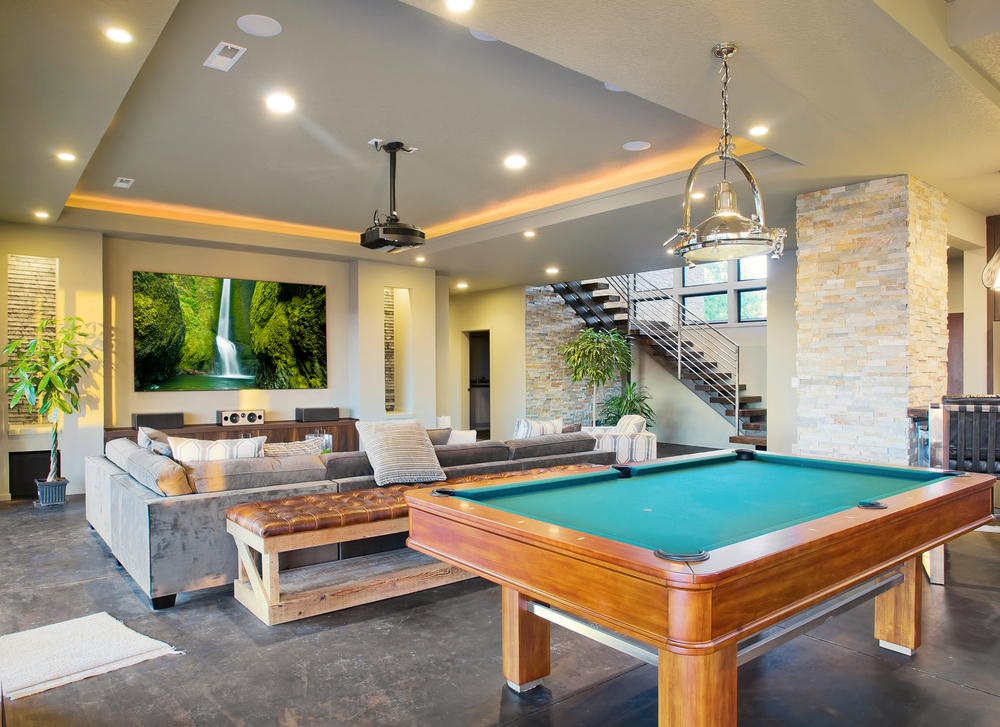
Before you run out to the store, take a look at your existing decor. Look for rich colors, and pay close attention to any decorative pieces you have that have motifs like elk, deer, pine trees, cardinals, snowflakes, or berry bushes. You can use those pieces to help create your overall holiday vision.

Related Blog: Inexpensive Home Decor Ideas for Your Apartment

Pick A Color Scheme

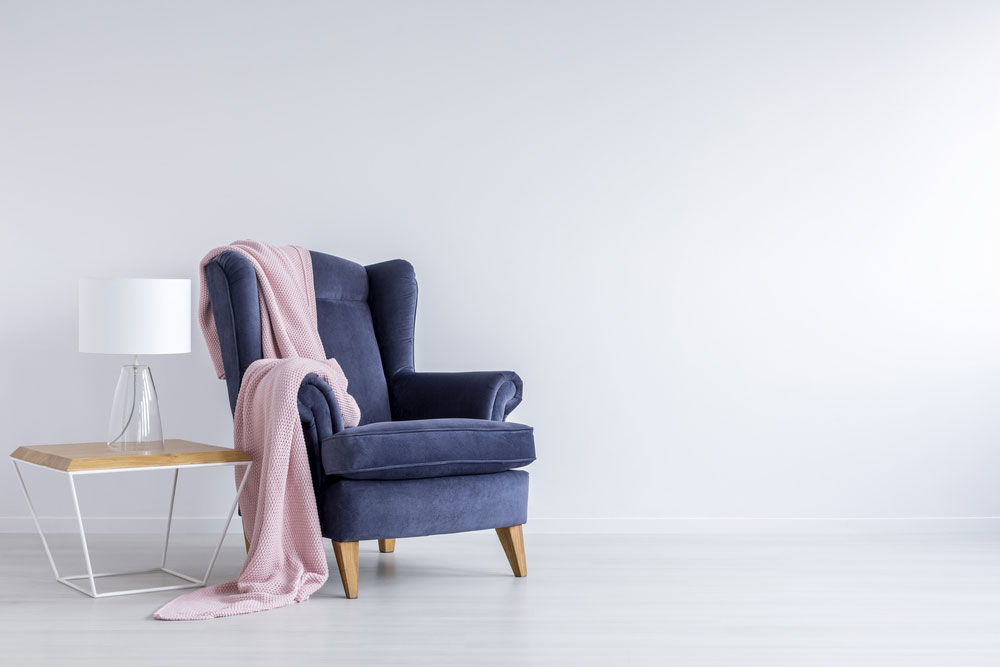
If you are more drawn to icy blues and bright whites than greens and reds, use them! You will probably have more of those colors in your year-long decor anyway. Do not be afraid to experiment with the addition of silvers and golds to brighten any room. Metallic surfaces reflect candlelight and can add to the overall ambiance you are building.

Create Calm

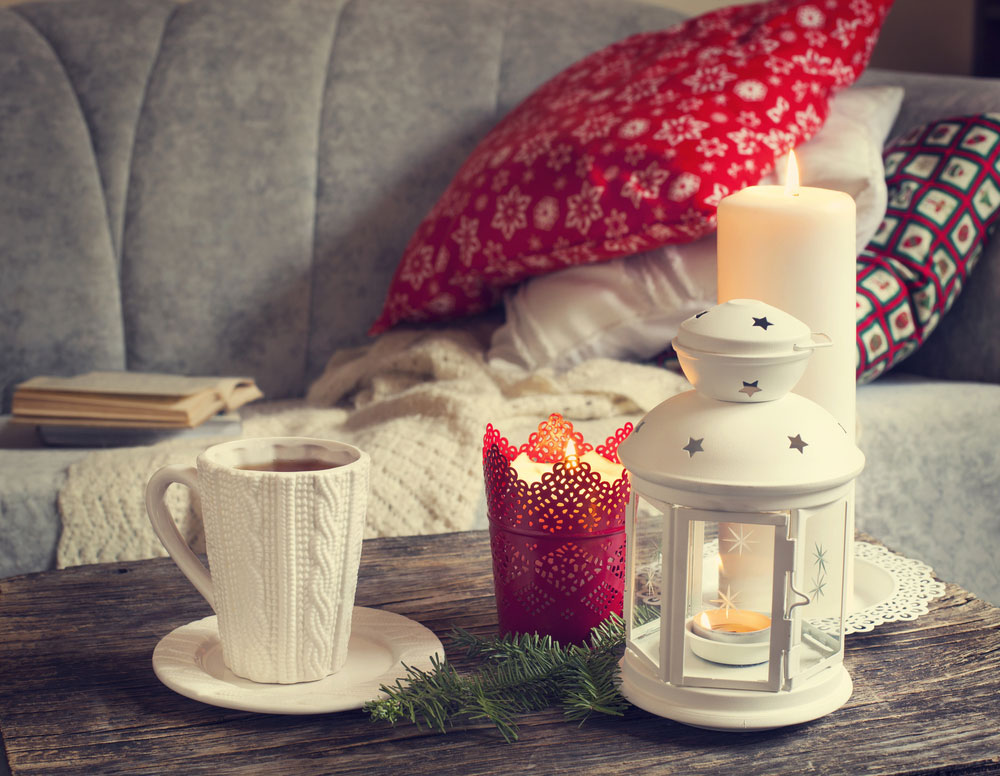
In a season of chaos, you and your guests can both appreciate a clean and calm environment. Try using candles and lamps in the place of overhead lights. This will give any room a cozy feeling. If you have little ones who might be roaming about, it is a good idea to use flameless candles that have LED lights in them to make them fire safe. Use lots of folded blankets to change the color scheme of your standard furniture. Remember that your friends and family will be happy to be with you for the holidays and that any environment you create will be wonderful!

Related Blog: Interior Design Tips for a Cozier Bedroom

Contact Ellecor Today

If you feel that your home could use a revamp, contact Ellecor today! We provide a full range of interior design services and work with your unique needs, tastes, and ideas. Contact us online today or call us at (417) 720-2602.

Ellecor & Interior Design Tips for Cozy Minimalism

Blue chair with pink blanket on it against white wall

Cozy minimalism is a rising trend in the interior design world. This trend is essentially the halfway point between harsh minimalism and a busier interior design trend. You don’t want your house to be cluttered, but you also don’t want it to feel like an operating room. The idea behind cozy minimalism is to focus on both comfort and functionality. Read on to find out more about how to curate a cozy minimalist look in your own home!

Curate a Functional Base

Get the basics right! Invest in pieces of furniture that will fit the function of the room. Build your room around simple and sleek pieces. If you’re designing a living room, your couch (which is the piece of furniture that expresses the function of the room) should be the focal point. Everything else in the room should focus on enhancing that space and highlighting its function. Function is king in a minimalist design!

Related Blog: Custom Furniture Tips: Creating a Piece That’s Unique to You

Quality Over Quantity

Instead of spending money on lots of cheap décor that can end up making your home look cluttered, invest in high-quality pieces of décor that enhance the space without overwhelming it. Spend time curating your collection of décor so that you don’t end up with extraneous ornamentation.

Related Blog: Decor Tips for an Elegant Dining Room

Add in Some Texture

A great way to make a minimalist design feel cozy is to add texture to your space. You can do this by adding a fuzzy area rug. Also, a few blankets draped over chairs and couches will give the space a soft, inviting feel.

Don’t Forget to Accessorize

Cozy minimalism doesn’t call for a rejection of all accessories. Rather, you should carefully choose your pieces so that each one adds something to the space. Choose minimal accessories so as not to make the space feel cluttered. Use things like throw pillows or wall art to add pops of color to your simple design. If you forgo accessories altogether the room will feel sterile, so choose a handful of pieces that speak to your sense of cozy style.

Let Ellecor Help!

If you feel lost with your attempts to implement a cozy minimalist interior design, let the incredible interior designers at Ellecor help! Come talk to one of our team members, and they’ll be able to help you draw up a design that you’ll fall in love with. Contact us today to set up an appointment!

Interior Designer: Creating the Perfect Entertainment Room

Interior Designer – Entertainment Room – Ellecor

Whether you’re a fan of hosting get-togethers with friends or you’re a big time movie buff, it’s a great idea to have space in your home dedicated to entertainment. This gives you the perfect space to kick back after a long day at work, as well as a place you can retreat to on the weekends. Turn your home into the go-to site for Superbowl parties and movie nights!

To help you navigate the interior design details, we’ve written a blog with tips from our professional interior designers on what to keep in mind when you’re designing your entertainment room. Read on to discover our suggestions!

Get the Right TV Screen

If you’re going to create an entertainment room, you are going to want a big screen for big entertainment. Where else would you watch epic movies and sports? It’s great to go big, but make sure that you choose a screen that fits your space. There are so many options out there that it can be hard to choose. So make sure to do your research and consider bringing in an interior design expert!

Feel cramped in your new entertainment room? Ellecor Interior Design might have a solution. Read another one of our blogs to find out: Interior Design Tips for Making an Area Look Bigger

Get the Right Decor

The right decor is entirely dependent upon the theme you’re going for. If this space is primarily for viewing classic cinema, you might consider classic movie posters or memorabilia on your walls. If you want this to be more of a sports-themed area, consider hanging signed jerseys or other sports-related decor on your walls. Just make sure that your room has a unified feel that fits your lifestyle.

Invest in Some Comfortable Furniture

If you’re going to be spending a lot of time in your entertainment space – and we’re quite confident you will – you want to make sure you have comfortable seating. Invest in comfy armchairs and a cozy couch. If you’re wanting the room to have more of a movie theater feel, then buy some quality reclining theater seats. Whatever you choose, make sure it’s comfortable!

If you can’t find that perfect piece of furniture, you can always look into custom furniture. Check out this blog to learn more: 4 Benefits of Custom Furniture

Build an Awesome Bar

A small bar is the last touch to a great entertainment room! You can wow your friends with your bartender skills when you bring out some fancy beverages for your next get together. It can be a small subtle bar off to the side, or you can make your bar the focal point of the space. Whatever your personal preference, we highly suggest having a space like this where you can make drinks and snacks for yourself and your guests.

Hire An Interior Designer from Ellecor!

If you don’t feel like you’re entirely sure of what to do with your space, hire an interior designer through Ellecor Interior Design. Interior designers are fully equipped to carry out interior design projects to perfection. We have a highly skilled team of interior designers who will be able to help bring your dream entertainment space to life. Contact us today to talk to our team about everything our interior designers can do for you!

Interior Decorating For Nurseries

Decorating a nursery is an exciting experience, but it can certainly feel overwhelming as well. With so many options for furniture, bedding, and paint, it’s easy to get lost in the details. Luckily, Ellecor Interior Design has worked with several new parents, using our interior decorating knowledge to create functional, beautiful spaces that they can enjoy with their little one. If you are expecting a newborn, follow these interior decorating tips for your nursery.

Keep it Simple

From changing diapers to late night feedings, you will spend a lot of time in your baby’s nursery. When you are decorating, remember the function of the room. Keep your interior decorating choices simple and create a space where you can see yourself taking care of your newborn. Most of all, avoid clutter. Tripping over a misplaced toy in the middle of the night is the last thing you want.

Consider Storage

Storage is incredibly important in a nursery. Not only will you have diapers, wipes, pacifiers, and bottles, but you will eventually accumulate clothes, books, and more toys than you can imagine. To avoid clutter, make sure you have a place to store it all away. When you purchase a crib and changing table, try to find something with plenty of drawers and cabinets.

Invest in Thick Curtains

Naptime is important for both babies and parents. If your nursery is too bright during the day, your newborn may not be able to fall asleep. To ensure naptime runs smoothly, invest in some thick curtains that block out plenty of light.

Remember: Safety First

Lost in the details of interior decorating, it’s easy to forget about safety. When it comes to nursery safety, the list goes on and on, but there are a few general rules to keep in mind.

First, keep your crib away from the window. If your baby is too close to the window, they may reach for the chord, which can be a strangulation hazard.

Second, baby-proof all electrical outlets and keep all cords out of your child’s reach.

Third, choose water-based paints with low levels of volatile chemicals. Paint well before your baby arrives to give the room plenty of time to ventilate. If you are using wallpaper, choose something that is paper-based or made from natural fibers. Once again, this will decrease the chances of your newborn breathing in harmful chemicals.

Have Fun with Your Interior Decorating

If you are feeling overwhelmed, remember that interior decorating is supposed to be a fun experience. This is your chance to create a home for your child, so let your imagination run wild. Choose a bright paint color and buy the cutesy lamp you saw at the home decor store. Remember that a nursery is only a temporary room that you will soon redecorate as your child grows older, so have some fun with it while you have the opportunity.

Contact Ellecor Interior Design

Ellecor Interior Design works side-by-side with our clients to create beautiful spaces that fit their lifestyle and needs. If you are planning an interior decorating project, contact us today!


Wood on Display

Brady and Haden Long, the husband-and-wife duo behind Ellecor Interior Design, share how to make eye-catching wooden wall displays.

The frame of Mind: To give their bedroom a pop of style, David Wenzel-Arizaga, and Jesus Arizaga-Wenzel made this wooden headboard with the help of Brady and Haden Long at Ellecor Design & Gifts.

Decorating an enormous, blank wall is often a challenge for anyone, even designers. Interior designer Haden Long and her husband, Brady, were faced with this challenge—specifically 1,000 square feet of blank drywall—when opening Ellecor Design & Gifts (2144 E. Republic Rd., Springfield, 417-720-2602, ellecordesign.com), an eclectic design and gift store in Farmers Park. To break up space, they decided to create several wooden wall features.

The inspiration came from vignette pieces Haden saw while at a market in Las Vegas. Vendors had displays on rollers and used them to separate items into 1,520-foot spaces. The Longs took the idea in a different direction by inventing wooden structures designed to distinguish space while making a bold statement on the blank walls of their business.

Haden says the wall features are not only aesthetically appealing, but they’re also versatile and practical. “The nicest thing about them is they finish off space without you having to have a bunch of art,” she says. The creation itself can function as a piece of art, or as a one-of-a-kind background to other pieces. One Ellecor client has a recreated form of the display used as a headboard. Another client uses a version to hang a deer mount. It can also be used as a collage wall, a place to hang the television or even a rustic backdrop for wreaths. Depending on the wood and stain used, the look can fit in almost any home. If a rustic look isn’t your thing, add a coat of paint in whatever color suits your taste.

If you love the look and you’re up for creating the piece for your own home, you’re in luck. Brady, who shares step-by-step directions on the following page, says the construction is fairly simple, and a 10-by-9-foot piece can be designed in about eight hours. But probably not if you’re building it all by yourself. The work, while doable, does require an extra set of hands, especially if making a larger piece. The wood is extremely heavy.

Directions

1. Choose your wood. Brady used maple and poplar. Choose something that has the look and character you want. You can use equal or varying widths. Buy a little more than you might need.

2. Sand the wood just enough to smooth any roughness that might cause splinters.

3. Layout pieces to determine exactly how you want them to look on the wall. Stagger the lengths, and the widths if desired.

4. Using a tape measure and saw, cut a couple of small scrap pieces equal to the space you want between the horizontal boards. These will serve as spacers when hanging the wood.

5. Apply finish. Brady used natural Danish oil and wiped it on with a rag. Do this before hanging the wood.

6. Also before hanging the wood, locate the studs in your wall using a stud finder.

7. Secure the 2-by-4s vertically to the studs with construction adhesive. Then, add the 3½-inch screws to the 2-by-4s about every foot. (This thing is heavy, so there needs to be plenty of support to keep it from ripping out of the wall.)

8. Have a partner help you hang your horizontal wood pieces. With one person standing on each end, attach the bottom board to the 2-by-4s using an air nailer. Place the spacers you cut on top of this board. Then get the next board, and rest it on the spacers to ensure a correct width between boards. Continue this process until all of the boards are placed where you want.

9. Drill 2-inch screws into the center of the boards on each side for additional security.

10. You’re finished! You can leave the wooden fixture as is or decorate your new wall feature as desired. Hang art on it, use it as a headboard… there are plenty of options.

– Learn more on this related post: Wood on Display

Restore it with Billy Goat Paint

Little Billy Goat Paint

DIY’ers rejoice! A 417-land shop is selling an easy-to-use paint that won’t get your goat.

by Ettie Berneking

Little Billy Goat Paint is the perfect tool to add to your remodeling and DIY projects arsenal.

Put down that sandpaper and step away from the primer. You don’t need them! What you do need is to head to Ellecor Interior Design. While most of your shopping trips at this home decor store might have you dreaming about a new living room set or fantasizing about redoing that guest bedroom, this latest home remodel project is all DIY, and it starts with a can of Little Billy Goat Paint.

Finally released to the public in June, this paint/primer made its way to Ellecor in August, and owner Haden Long has already been busy painting chairs, tables, tin ceiling tiles, clocks, and picture frames.

“We’ve had some of our clients redo furniture, and we have helped with those projects,” Long says. “Often, we would just use Sherwin Williams paint or whatever was available at home improvement stores. But this line looked so easy to use, and I thought it would be perfect to have in store for our DIY crowd.”

Priced at $32 a jar and with 16 colors to choose from, the Little Billy Goat Paints have become an instant hit. 

To show off the product, Long and her team set up painting demos at Farmers Park and are always ready to help answer questions at the store. With a matte finish that veers toward antique in style, these paints are easy to use. There is no sanding or priming needed. Just grab a paintbrush and get to work. 

“These are really a one-step restoration paint,” Long says. “We’ve even used it on highly varnished furniture, and you can’t even scratch it off with your fingernail.”

Don’t see the color you like? Mix in one of the glazes—black, brown or white—to deepen, whitewash or alter any of the colors. And for those who have sworn off painting after several failed attempts, there are even six colorful paint sticks you can play with. Long used the sticks to bedazzle a clock and a few picture frames. “These are basically crayons for adults,” she says. Coloring time has never been so much fun!

Five Fun Ways to Use Little Billy Goat Paint

1.    Repaint an old wooden dresser to match your new bedding.

2.    Don’t throw away that boring clock. Use the paint sticks to give it a new look and plenty of style.

3.    Instead of spending tons of money on a new dining room set, just paint the two end chairs to create a new focal point.

4.    Use the paint sticks to jazz up inexpensive picture frames for the winter season. While updating your decor, this can double as craft time with the kids.

5.    This paint can be used on almost any material, even that outdated bathroom tile. Now your Pinteresting has a purpose!

– See more here.